If you’re going to be doing any amount of cooking, and you should, you’re going to need a sharp knife. A sharp knife really is safer (because you’re using less effort and not risking slipping), not to mention it makes the process of chopping, cutting, and slicing so much easier that it actually becomes enjoyable.
But if you’re like most people you never give two thoughts to your knives. You probably used your last set up until they were totally trash, and then got nice new ones as a wedding or birthday gift and have trashed those, too.
Let’s take a very brief detour to talk about what constitutes a good knife. As I see it there are three types of cooking knives: total junk, nice stuff that doesn’t cost a fortune, and high end craftsman-made pieces of custom steel. I’m a big fan of the middle category. The fact is, I just don’t want to have to expend daily energy and time to make sure I’m not ruining a knife that is a work of art by leaving it wet, or not wiping it down constantly. That rules out high carbon steel Japanese and artisan-made pieces. Although, listen, I’m not going to be mad about it if someone gifts me a Miyabi damascus gyuto. Anyway. Junk is junk so obviously that’s out. But for around $50-100 you can get a very nice stainless steel Henckel, Wusthof, Victornox, or Messermeister. These knives will hold a good edge, feel good in the hand, and will last a lifetime with absolute miminal care.
Nonetheless, even a great knife won’t hold its edge forever without sharpening.
There are three ways to sharpen your knives. I’ll give you the two easiest ways briefly, and then the badass way. The easiest is to just take it to a kitchen shop, hardware store, or professional sharpener. Most places are just going to run it through a machine that does a fine job, results in a sharp enough knife, but grinds off, relatively, a lot of the blade every time. This is fine for most people. The easy at-home option is to use a sharpener, like this http://amzn.to/2FYAmGs or this http://amzn.to/2tmFtO8. Again, this is fine for most people.
But, as usual there’s value in the way that takes more time and skill.
Stone sharpening has a few serious advantages over automatic sharpeners, in that in addition to taking less metal off the blade with each sharpening, manual stone sharpening allows you to maintain the exact edge angle that the knife maker ground into the knife in the first place. Edge angles vary based on the type of knife, and the designer’s preference or intent. It’s a shame to just grind that off with your electric sharpener.
When sharpening with a stone you need a medium to carry away the swarf (abrasive and tiny metal particles). Oil and water are the two main options, but I prefer water for the simple reason that there’s less cleanup, I don’t have to use a petroleum product, and I’m not putting mineral oil on my cooking utensils. As I see it there really aren’t any advantages to oil, and there are downsides.
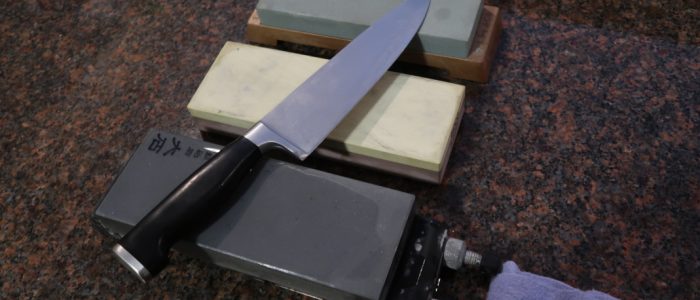
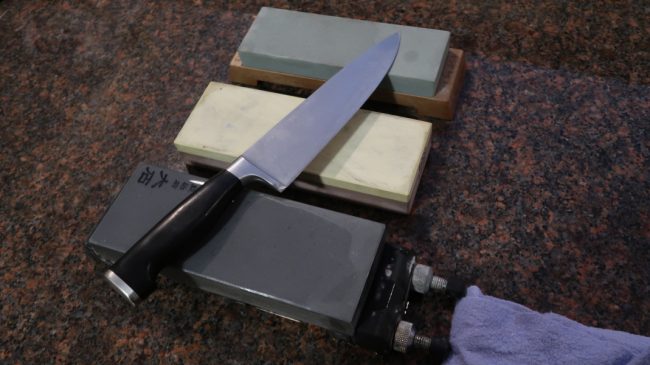
Having settled on water stone sharpening, you’ll need a set of stones. This set, which was gifted to me by a good friend, is a great mix of progressive grits. The 220 stone is only really needed if your blade is badly damaged and chipped, so you might use that the first time but probably won’t need it every time. The 1000 grit is your main workhorse for sharpening, but the 3000 and 8000 will take it from sharp to hair-shaving, mirror finish sharp.

As I mentioned, water acts as a lubricant and carries away swarf when sharpening with water stones. You’ll want to soak the stones in water for a few minutes, and then occasionally add a few drops as you sharpen and push water off the stone.
Sharpening knives by hand requires skill and feel. The difficult part is matching up the (intended) angle of the blade with the angle you actually hold the plate at on the stone. When you don’t have a practiced hand at best you grind the knife at a slightly different angle, and at worst you vary your angle with each stroke making it less effective and less sharp than it could be if you held a consistent angle. That being said, you’re very unlikely to ruin the knife so don’t hesitate to make mistakes and be less than perfect as you learn.
Starting with the coarsest grit (lowest number) you’ll want to do about a dozen strokes per side of the blade, alternating strokes, making sure that you hold a consistent angle and evenly draw the entire blade across the surface of the stone. Opinions vary as to whether or not you should push the blade along the stone towards the edge, or draw it backwards away from the edge. Personally I have ended up in the towards the edge camp for reasons I don’t think are necessarily valid or important. Do what you feel. The only downside to this is that you can gouge your stone if you’re not careful when you get up into the higher grits and your blade is very sharp. Being careful eliminates this problem.
After you’ve finished with one stone, move to the next one. I do all my knives in batches and do all on one grit stone before moving to the next.
When you’re finished, as a test, you should be able to easily slice a piece of paper with no effort, just drawing the blade across the paper.
Rinse off any water and swarf, and wipe it down with a dry towel. You now have the sharpest knives in the neighborhood.
What is that thing people do with the steel rod before or after they use their knives? Is that sharpening?
Honing with a steel doesn’t actually sharpen the knife, but it does re-align slight curvatures or displacements that regular use puts on the very very fine sharpened edge of the blade. This can help maintain a better edge for longer, and make it easier and quicker to sharpen the edge when you do use the stones. You should do it every time you cook with your knife.
Whether you decide to go with a quick and easy method, or you go all out with a set of stones, you’ll enjoy the pleasure of cooking with sharp knives. In a follow-up I’ll cover some more esoteric and advanced techniques for getting the ultimate edge.


Leave a Reply